

How to Paint Over Outdated Wood Kitchen Cabinets?
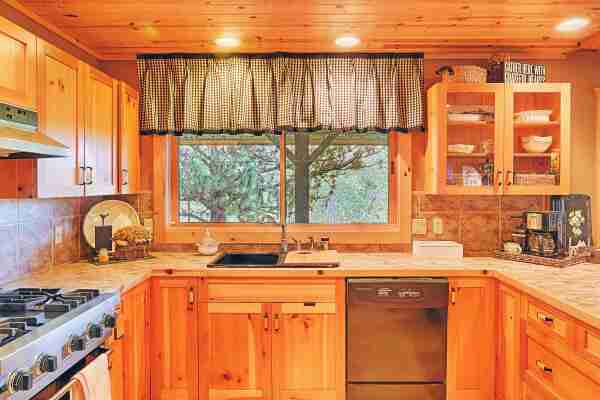
Whenever it comes to give your kitchen an authentic and classy look, wooden cabinets are ultimately what comes to our minds first. Moreover, wooden kitchen cabinets are also a preferred choice as they offer a luxurious and rich feel with minimum investments.
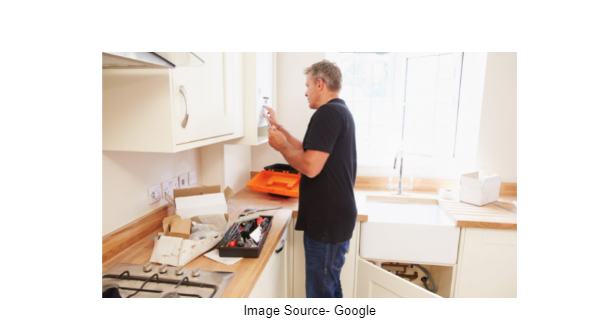
Generally, it is recommended to hire professional interior contractors as there are components such as time efficiency, better quality, insurance cover, availability of tools and equipment, and knowledge of the basics of painting a house.
But if you are keen on utilizing your creative skills and looking forward to that are outdated or simply want a fresh coat, here are some tips and techniques that will save you 100s of bucks.
Read Related Post: How much does it cost to repaint kitchen cabinets?
Can you just paint over cabinets?
It is not ideal to just paint over cabinets without making the surface smooth. Outdated wood cabinets can be repainted but they do require some preparations like sanding the surface for any scuffs, filling the holes (if there are any) for better retention of high-quality paint .
How can I make my outdated kitchen look better?
The fastest and quickest way is to repaint the old worn-out cabinet doors with trending paint combinations . You can always go for refinishing the old ones with glass or high-gloss shine paint to give your kitchen cabinets a sheen and sleek look.
Read Related Post: How Painting Can Improve Your Home's Value?
How to Paint Over Outdated Wood Kitchen Cabinets?
Step 1: Remove Cabinet Doors and Drawers
It is a better idea to remove cabinets and take them to some open space as you don’t want to spill your paint on the entire kitchen floor and deal with the mess later on. Safely remove all the knobs, latches, nuts, or other hardware parts.
Step 2: Clean the Cabinets
It is important to clean the surface of the kitchen cabinets and the area after uninstallation of the cabinets as you would not want to put back the entire cabinet on a pile of mess. In addition, prepping the wooden surface before paint requires a crucial step like cleaning the cabinets.
But if cleaning is not your cup of tea, you may as well leave it to MGP’s professional painters who will complete the job for you from scratch to finish.
Step 3: Repair holes, dents or Gouges
If you had installed your cabinets a long time back, there are higher chances that the cabinets might have experienced a few scratches, holes, and even gouges over time. So, your next ideal step should be to fill any holes, dents, or gouges using dowels and some instant glue.
Step 4: Sand the surface
Allow the holes to dry after you have put glue and then use sandpaper to smoothen the surface outside the cupboards.
If your repainting project is only a facelift for the cabinets, you may skip sanding within the cabinets. Cover the edges with painters' tape for a perfect completion and sand just the front surfaces.
While sanding, analyze the cabinet. It is not mandatory to eliminate the entire paint which is already in sound condition. Gently apply the sandpaper to worn spaces of old paint. In addition, make sure to sand over glossy regions to deglaze any excess past finish. Obstinate completions might require scouring with denatured liquor and fine steel fleece.
Sand the regions that are sticking off for any oil buildup getting under the paint layers in the wood. Any place you sand down to uncovered wood, attempt to mix or "quill" the edges where the old paint meets the wood so the new paint will lay on the level.
Vacuum the sanding dust from all surfaces. If you have an air blower, utilize high-constrain air to blow the residue out of cleft or hard-to-reach areas. Wipe down the cabinets to be painted with fabric to get any excess sanding buildup.
Read related post- Pre-painting tips from the experts at MGP
Step 5: Apply Primer
Use a decent quality 3-inch brush to apply an even layer of primer to all surfaces to guarantee an all-around reinforced completion. Usually, only one coat of primer does the trick. But if a preliminary coat isn’t enough, you may put on another coat.
Another benefit of applying primer is to give a decent base to semi-shine, water-based paints. Reflexive polish paints were once the favored choice for kitchen cabinets since it opposes stains and water and is effortlessly cleaned; however, the present water-based paints are simpler to work with and give a similar finish.
Read related post Paint your home like a pro with the painting rules
Step 6: Apply Semi-gloss Latex Paint
Start by painting the interiors of the cabinet and openings of the face outlines, the external sides, and lastly the outside fronts. This allows you to work systematically and empowers you to see and address any dribbles on the most apparent regions.
Then, paint the cabinet’s fronts, alongside any different wood pieces or moldings. Evenly apply the paint and ensure to cover the entire space. Flimsy coats leave less apparent brushstrokes and dry all the more rapidly. Don't apply thick coats of paint or overdo it. Applying too many brush strokes will make bubbles appear.
Let the paint dry completely. Give it four to five hours between each coat. Two layers of value paint are typically all that is important, yet you might need to add a third coat since kitchen cupboards take a bunch of applications.
Step 7: Put the knobs or any other hardware back
In case you are joining another piece of equipment in a better place than the first, utilize a mix square to stamp the position of the equipment on entryways and cabinet fronts. Slide the marker to estimations and imprint with a pencil.
Step 8: Pre-drill then attach hardware
Focus the spring punch on the imprint, pull back, and discharge. Then, at that point pre-drill every one of the openings set apart by the spring punch. Add the equipment screws from the back and fix them into the handle with a screwdriver.
delivers five-star quality exterior house painting services without the five-star price! We have a dedicated team that completes each job within your budget and timeframe. You can anticipate amenable and proficient customer assistance and great work tailored to suit your house's requirements.Recent Posts
- Garage Floor Painters & Concrete Coating Experts Near You: What to Expect in 2025
- Business Painting Services That Mean Business: What to Expect from a Professional Commercial Painter
- What’s the Difference Between Commercial and Residential Painting Services?
- Types of Commercial Painting Services Explained: Interior, Exterior & Specialty Jobs
- Why Commercial Properties Need Specialized Painting Solutions
- Office Building Painting 101: Tips, Colors & Cost Guide
- Top Qualities to Look for in a Commercial Painting Company
- Interior vs. Exterior Commercial Painting: What Your Property Needs First
- Retail Painting Services: How to Keep Your Storefront Looking Fresh Year-Round
- How to Choose the Right Commercial Painting Contractor for Your Building
- Need Commercial Painting Experts Near You? Here's What We Offer
- Everything You Need to Know About Painting Interior Doors
- How Long Does Interior Paint Really Last (And How Often Should You Repaint?)
- Painting Cabin Interiors: Best Colors, Finishes, and Techniques
- Interior vs. Exterior Paint: What’s the Real Difference?
- Painted Hardie Board & Wall Texture Tips: What Homeowners in Cornwall Hudson Need to Know
- From Walls to Exteriors: Luxe Finishes with Foil Gold Wallpaper, Pre-Painted Hardie Board & Sherwin-Williams Products
- How Much Does It Really Cost to Sand Texture a Painted Wall?
- Vinyl Plank vs. Laminate Flooring: The Ultimate Homeowner's Guide
- Top Tips to Choose the Wall Texture Types for Your Home
- Affordable Painting Services Near Me: How Much to Paint a Bedroom and Other Home Painting Costs
- Affordable Painting Contractors Near Me: How Much Does It Cost to Paint a House Exterior?
- How to Save on Painting a Two-Story House: Affordable Painting Contractors in Your Area
- How Much Does It Cost to Paint a Room? Find Affordable Painters Near You
- Interior House Painting in Bergen & Rockland County – Done Right
- Can You Use Interior or Exterior Paint in the “Wrong” Place?
- How Long After Washing Walls Can You Paint? Plus, Expert Help from MGP Painting
- Why Hiring Professional Painters is the Best Decision for Your Home or Business?
- Why Hiring Professional Painters is Key to Stunning Venetian Plaster Walls?
- Why Choose Professional Painters for Your Interior Painting in Westchester County, NY?
- Why a Fresh Coat of Paint is the Perfect Gift for Your Home This Holiday Season?
- The Best Crown Molding Ideas for Your Mobile Home
- When to Use Elastomeric Paint on Stucco Surfaces?
- How Whitewashed Brick Can Give Your Rockland House a Stylish, Modern Vibe?
- The Ultimate Guide to Cleaning and Staining Cedar Siding
- How MGP Painting Resolves Exterior Painting Issues in Allendale, Ardsley, and Baldwin Place?
- How to Choose the Perfect Rustic Barn Colors for Your Property?
- Painting James Hardie Siding: The Best Exterior Paint for Painting Fiber Cement Siding
- Wood vs. Vinyl Siding: A Comprehensive Comparison
- Paint or Replace Vinyl Siding: Which Option is Right for Your Home?
- Embrace Fall 2024 with Trendy Home Colors: Insights from Magnolia Homes and Sherwin-Williams
- Trending Colors in Residential Interior Painting for 2024
- The 3 Biggest Mistakes Westchester Homeowners Make in DIY Kitchen Cabinet Painting
- Top 5 Painting Tips To Get Your Rockland Home Holiday-Ready
- Why Choose a Professional Interior-Exterior House Painting Contractor in Westchester County, NY
- 5 Tips for Choosing the Right House Painter in Bergen County, NJ
- What is the average cost to remove wallpaper in Rockland County?
- How much does it cost to hire an interior painter?
- How much does it cost for interior painting in Westchester County, NY?
- Cost of Painting Kitchen Cabinets Vs Replacing them | A Detailed Comparison
- How Much Does it Cost to Paint Kitchen Cabinets in 2022?
- Five Common Problems Professional Wallpaper Installers Face
- Time Saving Tips For Easy Foil Wallpaper Installation
- What to Expect from MGP’s Professional Wallpaper Installation Service In Westchester?
- Is Prepasted Wallpaper Installation Easy?
- Why is Grasscloth Wallpaper Installation Service so expensive?
- Professional Wallpaper Installers Near Westchester County-An MGP Painting Guide
- Kitchen Cabinets Painting Costs In 2022- MGP Painting
- Why was Popcorn Ceiling Popular?
- What is the Average Wallpaper Removal Cost Per Room?
- New Construction: How to Choose Best Paint Colors For Your Westchester Home?
- Warehouse Ceiling: Best Painting Options
- WALLPAPER INSTALLATION SERVICES - MGP PAINTING
- Masking Tape: Painting Techniques for a Flawless Paint Job
- Wall Mural Painting Ideas
- Laminate Flooring v/s Vinyl Flooring
- Different Types of Wall Textures
- How Much Commercial Paintings Cost?
- Eco-Friendly Paints: Brands You Should Try and Why People Love Them.
- How Long Does a Paint Job Last?
- Spray Paint vs. Brush Paint. Which is Better?
- How to Spray Paint a Metal Bed Frame?
- What is The Best Paint Type for Bathroom Walls
- How to Paint Over Outdated Wood Kitchen Cabinets?
- Types of Epoxy Flooring and Epoxy Installation Process
- How to Dispose of Old Paints?
- How Long After Washing Walls Can You Paint?
- How to choose ceiling colors for your living room accentuating walls?
- Wallpaper vs Paint: Which one is a better option for walls?
- How to Ensure Child Safety While Painting Your House?
- What is the difference between Venetian plaster and regular plaster?
- The Benefits of Deck Paint and How to Increase the Longevity of Your Deck?
- What is the best benefit of epoxy flooring?
- What is the best way to remove existing finishes from wooden decking?
- What Are The Benefits Of Hiring An Epoxy Flooring Contractor?
- Five Benefits Of Hiring A Professional Interior Painting Contractor
- How to Fix Painting Mistakes on Walls?
- Which Season Works Best For House Exterior Painting
- How To Remove Popcorn Ceiling?
- How Often Should You Paint The Exterior Of Your House
- Best Way To Clean Walls Before Painting
- How much does it cost to repaint kitchen cabinets?
- Fall In Love With Your Walls This Season
- When Is It Time to Paint? (Pssst… Now!)
- Prepare Your Home For Summer
- Do’s and Don’ts of Painting When You Want to Sell Your House
- Paint Your Home Like a Pro with These 5 Painting Rules
- Your Interior Colors can Affect Your Mood
- Need a Power-Washing or a Pressure-Washing?
- Affordable, Trendy Designs, at Attractive Prices
- How Painting Can Improve Your Home’s Value
- Why Yearly Deck Maintenance is Important
- 5 Things to Know When Choosing a Paint Color
- Local vs. National: Why Hire Close to Home?
- Pre-painting Tips from the Experts at MGP
- How the Professional Residential Painting Services Are Perfect for Your Home