


Types of Epoxy Flooring and Epoxy Installation Process
Epoxy flooring materials are becoming increasingly popular in commercial as well as industrial use. Epoxy flooring comprises a two-section epoxy system- a blend of polymer resins and hardeners, similar to an epoxy glue. These organic carbon chain compounds mixed with other elements like hydrogen, oxygen, and nitrogen look extremely incredible, along with lifetime advantages.
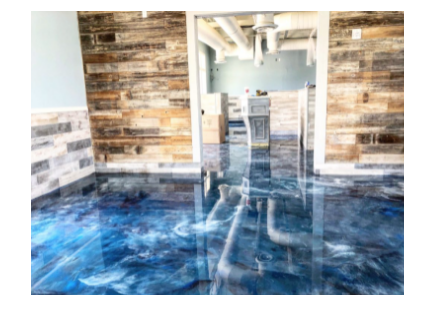
The epoxy flooring is of different types which are used on floors. Some types are self-leveling epoxy coatings, self-dispersing epoxy, graveled, mortar epoxy, antistatic epoxy, and vapor barrier epoxy. Each of these has distinctive advantages.
Advantages of Epoxy Flooring:
- Epoxy creates a shiny gloss surface.
- It offers a hard, durable surface able to withstand heavy traffic and vehicle movement.
- Quick and easy installation process.
- It requires the least installation equipment, adhesive, and layouts.
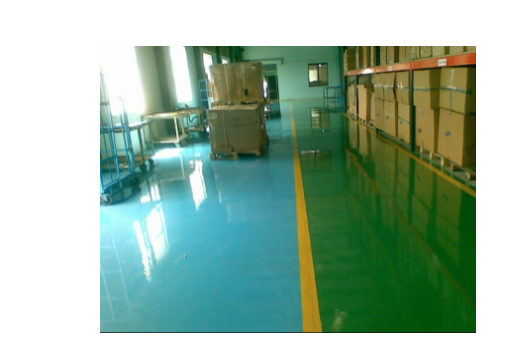
- Ideal for commercial and industrial applications
- Resistant to oil stains, watermarks, and scratches.
- It helps create a smooth high-end texture on a surface that lasts lifelong.
Types of Epoxy
- Self-Leveling Epoxy Coating: These are easy to use and install over new and old concrete floors. These types of epoxy are best to level the floor and create a seamless and smooth surface. Self-leveling epoxy coating can be used in storage places, garages, kitchens, dining rooms, office buildings, etc.,
- Self-Dispersing Epoxy: This type of epoxy is commonly used in areas prone to frequent movement of vehicles or trucks as this epoxy has great mechanical strength. It is durable and commonly noticeable in food processing industries, logistics movement, or liquids, as this epoxy also has anti-slip characteristics.
- Graveled Epoxy: Graveled Epoxy coatings are the most decorative epoxy flooring choice as they are easily customizable according to customer’s needs. Brands often use this type of epoxy to add branding marks, decorative details, and logos on the floors.
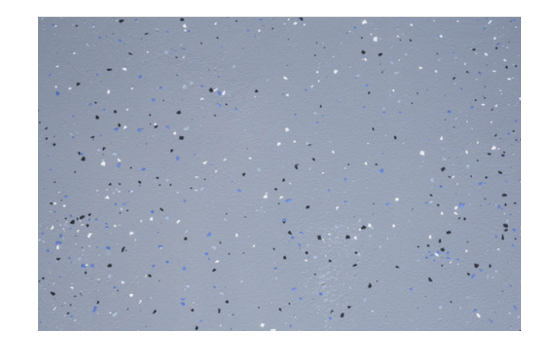
- Flake Epoxy: Flake Epoxy is a style of applying an epoxy coating. With this technique, professional epoxy flooring painters can create multi-colored flakes or chips added to the epoxy mixture to achieve a flaky look.

Step by Step Instruction for Epoxy Flooring Process
Step 1: Cleaning the Surface
The intended surface should be spotless. You can begin the floor cleaning process with a leaf blower to get rid of the wood chips, dirt, or anything that’s sitting on the surface.
Note- When you blow all the floor dust, ensure to use the leaf blower on the walls as well.
Step 2: Inspect the Floors for any residue.
Believe it or not, the worst happens when we least expect it. To avoid falling into the worst case, you should ensure a final inspection of the floor before installing the epoxy. If there is any paint drip on the floor, you can use Soy Gel or a paint stripper to lift the paint.
Step 3: Sanding the Floor and Vacuuming
Sanding will help balance out the rough concrete edges and flatten your floors smoothly. You can hit the floors with a sanding screen at 60 or 80 grits two times perpendicular to each other. Now, remember that sanding will create a lot of dust. For that, you can apply water and then vacuum it all up.
Step 4: Acetate
Mix one to one ratio Water with Muriatic Acid and apply with a sprayer. In circular motion. The circular motion spraying will prevent getting patterns on your concrete and give you better coverage on that concrete.
Step 5: Neutralize the Acid
Use Ammonia and Water mixture in the ratio of 20:1. You can use a commercial scrubber to spread the water and ammonia mixture, or you can throw the mixture with a cup on the entire floor. Make sure to spread the mixture using a stiff-bristled broom and vacuum it next. Don’t leave anything undone. Cover everything.
Step 6: Cleaning up Ammonia
After neutralizing the acid, give the floor one more rinse with clean water. Now in a way, you need to clean up the Ammonia. Give the floor one pass or maybe two until it is clean. The vacuum will absorb water from the pores of the floor.
Note: Use the commercial vacuum. Just moping or wiping is just like gliding over the floor.
Step 7: Let the floor dry.
After absorbing the water all day, your floor will end up with a high moisture level. Thus, it would help if you made sure the floor is entirely dry. Leave it dry completely overnight. The moisture level in the floor should be below 50% when you apply epoxy.
Step 8: Applying Epoxy Flooring Material
Now that the floor is prepped, clean, etched, you can apply epoxy. Tape off all the boundaries. Tape off the border or anything you don’t want the epoxy on. Stage your mixing area properly. Epoxy comes in two parts. Part A and Part B.
- Add about 5% of Acetone to Part A. (To make the epoxy runny and increase pot life).
- Put it on the concrete and use a ⅛” notched squeegee to roll the epoxy evenly on the floor.
- Backroll the epoxy again with a ½ inch nap shed solvent resistant roller. (Get high-quality rollers)
- Give the floor two coats of Part A and Part B of epoxy. (Let it sit overnight)
- If you notice bubbles on the floor, take the hundred grit sandpaper or sanding screen on your buffing machine and buff the floor properly.
- Do the second coat (Ensure to use one kit at a time).
- Add a coat of Polyurethane 100 to protect the top of the epoxy.
- If there are imperfections here, scuff up the epoxy.
Recent Posts
- Why Summer Is the Best Time to Paint Your Home
- 7 Signs Your Home Needs Exterior Painting This Summer
- The Best Exterior Paint Colors for Summer 2026: Popular Choices for Homes in Rockland County, Bergen County, Westchester County & the Hudson Valley
- Garage Floor Painters & Concrete Coating Experts Near You: What to Expect in 2025
- Business Painting Services That Mean Business: What to Expect from a Professional Commercial Painter
- What’s the Difference Between Commercial and Residential Painting Services?
- Types of Commercial Painting Services Explained: Interior, Exterior & Specialty Jobs
- Why Commercial Properties Need Specialized Painting Solutions
- Office Building Painting 101: Tips, Colors & Cost Guide
- Top Qualities to Look for in a Commercial Painting Company
- Interior vs. Exterior Commercial Painting: What Your Property Needs First
- Retail Painting Services: How to Keep Your Storefront Looking Fresh Year-Round
- How to Choose the Right Commercial Painting Contractor for Your Building
- Need Commercial Painting Experts Near You? Here's What We Offer
- Everything You Need to Know About Painting Interior Doors
- How Long Does Interior Paint Really Last (And How Often Should You Repaint?)
- Painting Cabin Interiors: Best Colors, Finishes, and Techniques
- Interior vs. Exterior Paint: What’s the Real Difference?
- Painted Hardie Board & Wall Texture Tips: What Homeowners in Cornwall Hudson Need to Know
- From Walls to Exteriors: Luxe Finishes with Foil Gold Wallpaper, Pre-Painted Hardie Board & Sherwin-Williams Products
- How Much Does It Really Cost to Sand Texture a Painted Wall?
- Vinyl Plank vs. Laminate Flooring: The Ultimate Homeowner's Guide
- Top Tips to Choose the Wall Texture Types for Your Home
- Affordable Painting Services Near Me: How Much to Paint a Bedroom and Other Home Painting Costs
- Affordable Painting Contractors Near Me: How Much Does It Cost to Paint a House Exterior?
- How to Save on Painting a Two-Story House: Affordable Painting Contractors in Your Area
- How Much Does It Cost to Paint a Room? Find Affordable Painters Near You
- Interior House Painting in Bergen & Rockland County – Done Right
- Can You Use Interior or Exterior Paint in the “Wrong” Place?
- How Long After Washing Walls Can You Paint? Plus, Expert Help from MGP Painting
- Why Hiring Professional Painters is the Best Decision for Your Home or Business?
- Why Hiring Professional Painters is Key to Stunning Venetian Plaster Walls?
- Why Choose Professional Painters for Your Interior Painting in Westchester County, NY?
- Why a Fresh Coat of Paint is the Perfect Gift for Your Home This Holiday Season?
- The Best Crown Molding Ideas for Your Mobile Home
- When to Use Elastomeric Paint on Stucco Surfaces?
- How Whitewashed Brick Can Give Your Rockland House a Stylish, Modern Vibe?
- The Ultimate Guide to Cleaning and Staining Cedar Siding
- How MGP Painting Resolves Exterior Painting Issues in Allendale, Ardsley, and Baldwin Place?
- How to Choose the Perfect Rustic Barn Colors for Your Property?
- Painting James Hardie Siding: The Best Exterior Paint for Painting Fiber Cement Siding
- Wood vs. Vinyl Siding: A Comprehensive Comparison
- Paint or Replace Vinyl Siding: Which Option is Right for Your Home?
- Embrace Fall 2024 with Trendy Home Colors: Insights from Magnolia Homes and Sherwin-Williams
- Trending Colors in Residential Interior Painting for 2024
- The 3 Biggest Mistakes Westchester Homeowners Make in DIY Kitchen Cabinet Painting
- Top 5 Painting Tips To Get Your Rockland Home Holiday-Ready
- Why Choose a Professional Interior-Exterior House Painting Contractor in Westchester County, NY
- 5 Tips for Choosing the Right House Painter in Bergen County, NJ
- What is the average cost to remove wallpaper in Rockland County?
- How much does it cost to hire an interior painter?
- How much does it cost for interior painting in Westchester County, NY?
- Cost of Painting Kitchen Cabinets Vs Replacing them | A Detailed Comparison
- How Much Does it Cost to Paint Kitchen Cabinets in 2022?
- Five Common Problems Professional Wallpaper Installers Face
- Time Saving Tips For Easy Foil Wallpaper Installation
- What to Expect from MGP’s Professional Wallpaper Installation Service In Westchester?
- Is Prepasted Wallpaper Installation Easy?
- Why is Grasscloth Wallpaper Installation Service so expensive?
- Professional Wallpaper Installers Near Westchester County-An MGP Painting Guide
- Kitchen Cabinets Painting Costs In 2022- MGP Painting
- Why was Popcorn Ceiling Popular?
- What is the Average Wallpaper Removal Cost Per Room?
- New Construction: How to Choose Best Paint Colors For Your Westchester Home?
- Warehouse Ceiling: Best Painting Options
- WALLPAPER INSTALLATION SERVICES - MGP PAINTING
- Masking Tape: Painting Techniques for a Flawless Paint Job
- Wall Mural Painting Ideas
- Laminate Flooring v/s Vinyl Flooring
- Different Types of Wall Textures
- How Much Commercial Paintings Cost?
- Eco-Friendly Paints: Brands You Should Try and Why People Love Them.
- How Long Does a Paint Job Last?
- Spray Paint vs. Brush Paint. Which is Better?
- How to Spray Paint a Metal Bed Frame?
- What is The Best Paint Type for Bathroom Walls
- How to Paint Over Outdated Wood Kitchen Cabinets?
- Types of Epoxy Flooring and Epoxy Installation Process
- How to Dispose of Old Paints?
- How Long After Washing Walls Can You Paint?
- How to choose ceiling colors for your living room accentuating walls?
- Wallpaper vs Paint: Which one is a better option for walls?
- How to Ensure Child Safety While Painting Your House?
- What is the difference between Venetian plaster and regular plaster?
- The Benefits of Deck Paint and How to Increase the Longevity of Your Deck?
- What is the best benefit of epoxy flooring?
- What is the best way to remove existing finishes from wooden decking?
- What Are The Benefits Of Hiring An Epoxy Flooring Contractor?
- Five Benefits Of Hiring A Professional Interior Painting Contractor
- How to Fix Painting Mistakes on Walls?
- Which Season Works Best For House Exterior Painting
- How To Remove Popcorn Ceiling?
- How Often Should You Paint The Exterior Of Your House
- Best Way To Clean Walls Before Painting
- How much does it cost to repaint kitchen cabinets?
- Fall In Love With Your Walls This Season
- When Is It Time to Paint? (Pssst… Now!)
- Prepare Your Home For Summer
- Do’s and Don’ts of Painting When You Want to Sell Your House
- Paint Your Home Like a Pro with These 5 Painting Rules
- Your Interior Colors can Affect Your Mood
- Need a Power-Washing or a Pressure-Washing?
- Affordable, Trendy Designs, at Attractive Prices
- How Painting Can Improve Your Home’s Value
- Why Yearly Deck Maintenance is Important
- 5 Things to Know When Choosing a Paint Color
- Local vs. National: Why Hire Close to Home?
- Pre-painting Tips from the Experts at MGP
- How the Professional Residential Painting Services Are Perfect for Your Home